
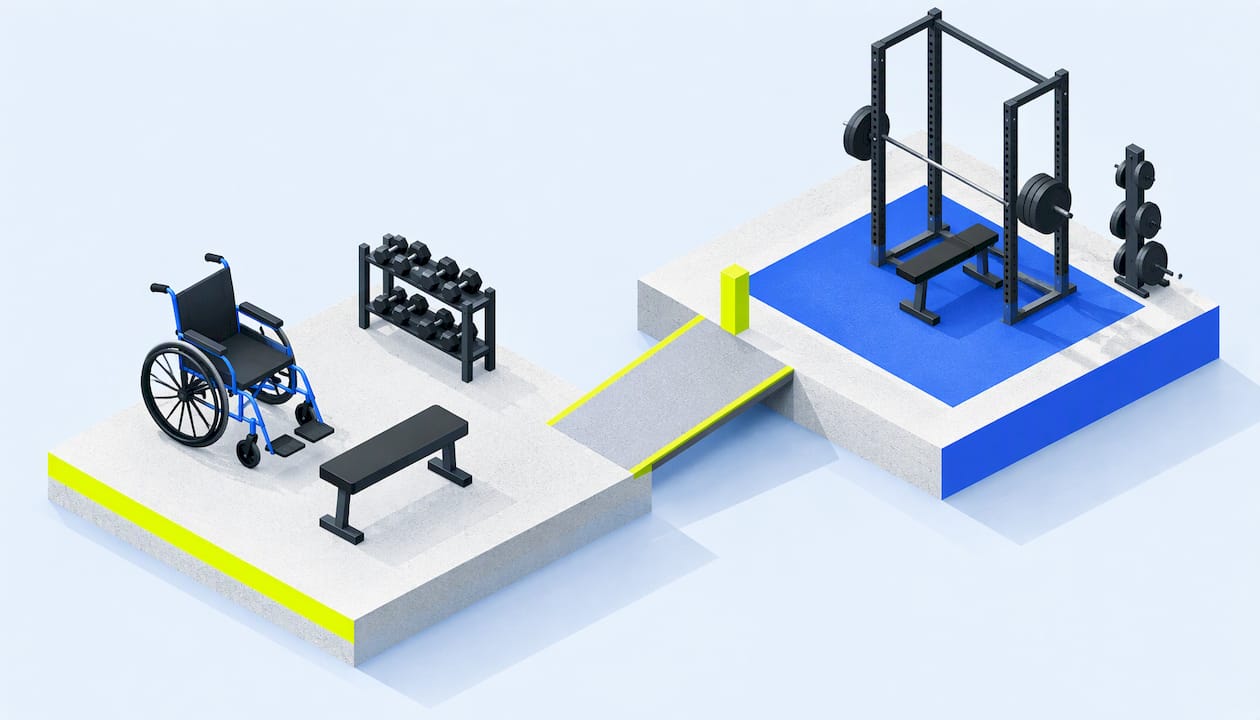
A transfer is the move between a wheelchair and another surface, such as a bench, a machine seat or the floor. In a gym, the best technique is the one the client already knows and controls. Your job is to set up the space, ask what they need, give only the help they ask for, and never agree to lift something you can’t manage safely. This guide covers what transfers are, how to prepare, how to help, and how to design a gym so fewer transfers are stressful.
TL;DR
- Transfers can be independent or assisted (sitting, standing or full-lift). The client usually knows their method best, so ask before you act.
- Set up first: brakes on, chair close to the target surface, path clear, removable armrests or footrests moved where appropriate.
- If you help, use good body mechanics, lift (never bump or drag), and encourage the client to do as much as they can.
- Don’t agree to a lift you are unsure you can manage safely. Don’t grip clothing or belt loops.
- Make the room work for transfers: clear paths, wide doors, turning space and equipment a wheelchair user can approach.
Table of Contents
- What transfer techniques are, and when you will meet them
- Before any transfer: assess, ask and record
- Setting up the space: the half of a transfer people skip
- If you are asked to help: body mechanics and rules
- Getting down to the floor and back up
- Making the gym work for transfers
- Our perspective
- Build the skills with Inclusive-AF
- FAQ
- Sources
What transfer techniques are, and when you will meet them
Australian guidance from Motivation Australia describes several types: independent sitting and standing transfers, and assisted sitting, standing and full-lift transfers. An assisted sitting transfer may use a board. Which one applies depends on the person, not on your preference.
In a gym you will see transfers in a few moments:
- Moving from a wheelchair onto a bench, mat or plinth for floor-free work.
- Moving into a seated machine, such as a chest press or lat pulldown.
- Getting from the chair to the floor for mat work, and back again.
- Using the toilet or changing area, where accessible changing rooms matter as much as the gym floor.
Many clients transfer many times a day and are experts at it. Others are new to a chair, or have a condition that changes day to day. A client with a spinal cord injury will have different needs from a client after a stroke, so it helps to read up on training clients with spinal cord injury and stroke exercise adaptations before you work with either group.
Why the upper body matters
The Queensland government’s Teaching the Skill document says that teaching a transfer technique uses upper-limb strength only. It also says practising the technique takes time and is essential for minimising injury risk and maximising independence. The US-based IFIT resource notes that the triceps are key muscles in transferring, and that the ability to transfer relates to independence.
That is useful for programming. Pressing, rowing and anti-rotation work can support a client’s transfer goals, but only if the client wants that goal. Don’t assume it.
Before any transfer: assess, ask and record
The most common mistake is starting with the lift. Start with a conversation.
Ask what they do and what they want from you
Use plain questions:
- “How do you usually get onto this seat?”
- “Would you like a hand, a spotter nearby, or space to do it yourself?”
- “Is there anything I should avoid doing?”
The client sets the plan. If they say they transfer alone, your role is to make the environment easy and stay close. If they want help, ask exactly where to stand and what to hold. Never assume you can take over.
Check readiness
The Queensland transfer teaching document says sitting balance should be reviewed before transfer practice starts. It also says alternative transfers (such as “legs up”) or assistive devices may need to be considered. For transfer practice it says near full range of movement is needed in the upper-limb joints, including shoulder external rotation, full elbow extension and full wrist extension, with care not to over-stretch the wrist flexors.
That is guidance for people teaching a transfer skill. If you are not a trained instructor of that skill, it is a reason to involve the client’s physiotherapist or occupational therapist rather than coach the technique yourself. Your own role is to support what the client already does.
Get consent and keep a record
Consent is part of professional practice, not a formality. The national unit SISFFIT033 Complete client fitness assessments requires you to explain the purpose, benefits and scope of a fitness assessment and to obtain the client’s consent. The NCSF standards of practice say exercise professionals should document informed consent, screening activities and participation decisions.
In practice that means a short note: what was agreed, what help the client wants for transfers, and who else knows the plan. Our guide to a disability risk assessment for gyms shows how to fold this into your existing process.
Setting up the space: the half of a transfer people skip
A well-set-up transfer needs less force and less help. Several sources agree on the same basics.
- Position the chair close. The Queensland guidance says to place the wheelchair as close to the plinth as possible, with the front angled in toward it to reduce the gap between the plinth and the cushion. The Physiopedia summary of wheelchair skills training also says to position the chair as close as possible to the target surface.
- Lock the brakes. Motivation Australia tells staff to put the brakes on. A US guide for wheelchair users on using fitness equipment says to lock the wheel-locks before transferring into or out of equipment.
- Move removable parts. Armrests or footrests that can come off may need to be moved out of the way, where appropriate and with the client’s agreement.
- Clear the path. Physiopedia’s guidance says the path between the start and finish surfaces should be clear of obstacles. Water bottles, bags and loose plates are the usual culprits.
- Check the destination. Know where the person is going. Set the machine seat, remove the pin or adjust the bench before the client moves, not during.
Using machines as transfer points
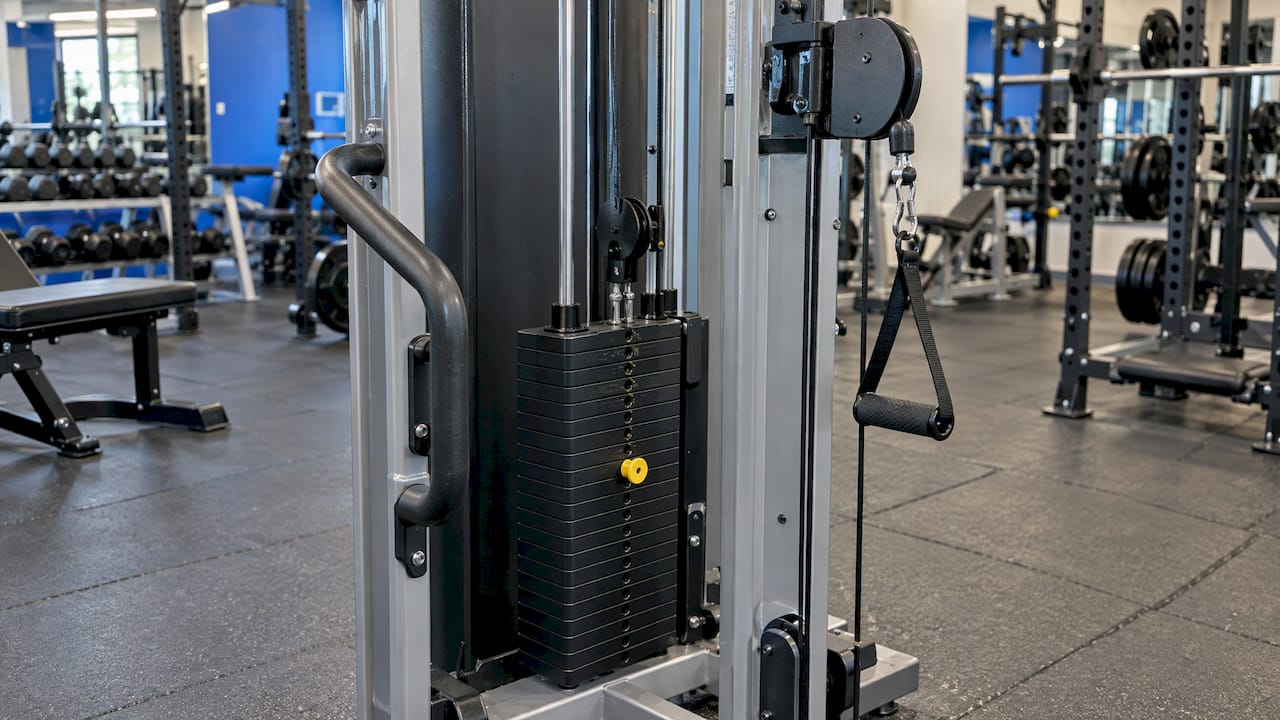
The US guide for wheelchair users says to use fixed grip locations for the transfer. Where a machine has none, a user can set the weight to the maximum and use the moving grip as a transfer point, as long as their body weight is less than the weight on the stack. That is a tip for the client to use, and the client should be the one to decide it suits them. Check the machine’s design first, and don’t improvise on equipment you don’t know.
A note on sitting position and sides
Physiopedia’s summary says people using sideways transfers tend to lead with the weaker or more painful arm, or alternate lead and trail arms if both arms are fairly similar, to share the stress. Notice what the client does and don’t correct it without good reason. It is their method.
If you are asked to help: body mechanics and rules
The Motivation Australia transfers guidance is the most useful single page for trainers who help. The key points:
- Plan the transfer first and make sure everyone helping knows their part.
- Move close to the destination.
- Stand with your feet apart and avoid leaning forward.
- Brace your body and use your whole body, not just your back.
- Check during the lift whether more assistance is needed.
- Lift. Do not bump or drag.
- Encourage the client to do as much of the transfer as they are able.
The last point is about dignity as much as safety. The client who does most of the work keeps control, and you keep your back.
What not to do
The same guidance is plain about limits. Don’t agree to lift if you are unsure you can manage it safely. Don’t grip a person’s clothes or belt loops. If you have doubts at any point, stop, put the person back in a safe position and get more help or a different method.
This matters for your own safety too. Warm up, move well and apply the same attention you would give a heavy set. If you want a refresher on training safely from the start, see this piece on beginner injury prevention.
When a manual transfer is the wrong choice
Choose another route when:
- The client’s weight, tone or pain makes you unsure you can lift safely.
- There is no second person and the plan needs two.
- The client has a method with a transfer board or hoist and the gym does not have the equipment.
- The client says they are not comfortable.
In these cases, switch to a session that does not need a transfer, such as seated work in the chair, or ask the client’s health professional about a safer approach. A gym that cannot support a hoist transfer should say so up front, not mid-session.
Getting down to the floor and back up
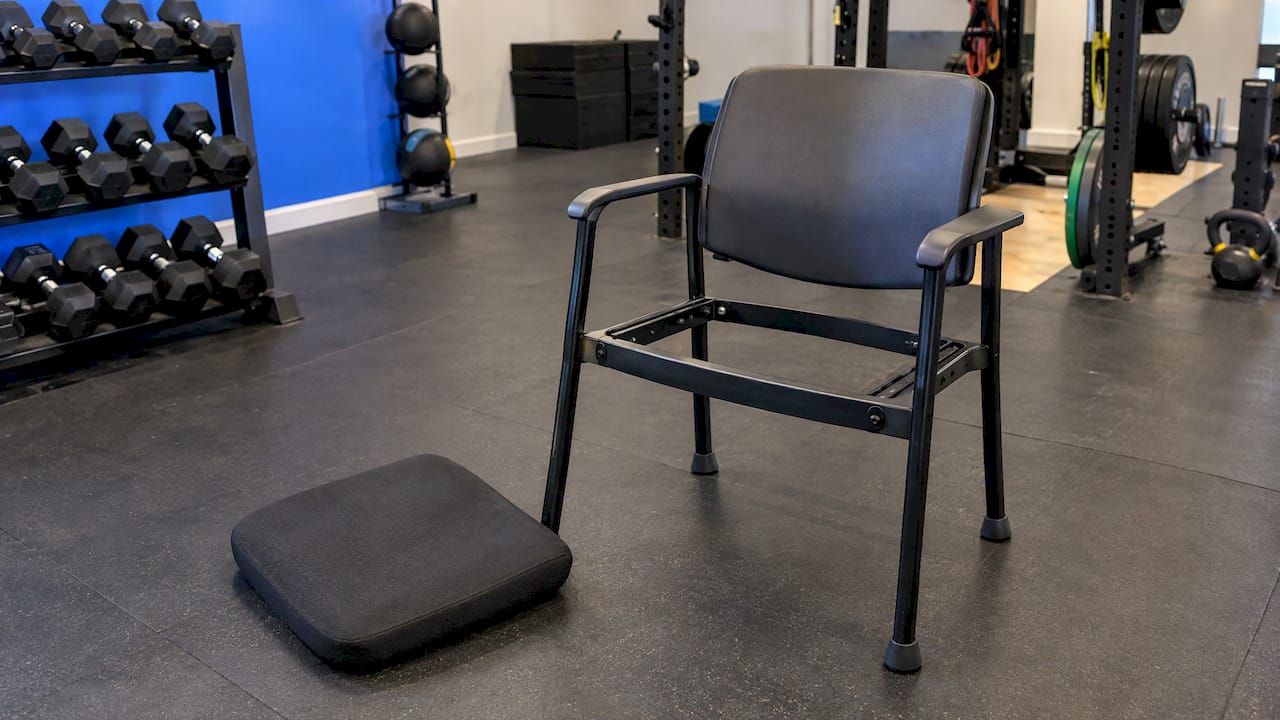
Floor work is where trainers feel least sure. The research here is thin, so keep this simple and client-led. Physiopedia’s summary offers one practical tip for going from chair to ground: if the seat cushion is removable, place it on the floor where the buttocks will land. It protects from excessive pressure and effectively lowers the seat height relative to the floor.
Beyond that, the method for getting up again varies a lot by person: some roll, some use a bench or the chair as a lift point, some need help. Ask the client to show you, plan who does what, and don’t improvise a technique you haven’t been taught. If floor work is a regular part of your sessions, get specific training from a physiotherapist or an accredited course and write the plan into the client’s file.
Making the gym work for transfers
Sometimes the best technique is a room that doesn’t demand one. The Australian Sports Association for People with Disability (ASAPD) publishes indoor venue guidelines that recommend:
- A minimum door opening width of 1000 mm where possible, and automatic doors where possible.
- Corridors and passageways wide enough for people with disability.
- A clear opening width of at least 1000 mm into accessible changing areas, toilets and cubicles, increased to 1200 mm where the facility may be used for wheelchair activities, to avoid the need to transfer from a sports chair to a day chair.
The Canadian OneAbility handbook suggests thinking about how a client moves from station to station. It says wheelchair users should be able to reach the facility and equipment safely, ideally with minimal assistance to support independence, and that clear paths reduce tripping hazards.
A quick floor audit
Walk the gym from the front door to the changing room in a chair, or with a client who offers to show you. Look for:
| Area | What to check |
|---|---|
| Entry and doors | Width, automatic opening, thresholds |
| Gym floor | Clear paths between stations, no stray equipment |
| Machines | Fixed grips, adjustable seats, space beside the seat to park a chair |
| Benches and plinths | Stable, at a height the client can use, no gap to the chair |
| Changing rooms | Door widths, turning space, bench and rail positions |
An equipment supplier’s design page, Lightin Fitness, offers a useful point of view: stations that can be used with the wheelchair staying in place avoid the transfer altogether, and an approach space of about 1.50 m in diameter in front of a station allows a chair to turn. Where you can, ask which of your machines can be used from the chair.
For wider design thinking, our guide to sensory-friendly gym design covers the other half of accessibility, and our disability inclusion basics cover the culture side.
Our perspective
Most transfer advice for gyms is written as if the trainer is the expert on the client’s body. We think that is backwards.
The client has done thousands of transfers. We teach trainers to ask first, to set the room up well, and to offer help in the way the client wants it. That is a practical skill, not a patronising one, and it is why we build our courses with people who live with disability.
Our modules are designed to give you the knowledge to talk about transfers with confidence: how to assess, how to get consent, how to plan with other staff, and when to say a manual lift is not safe. All of our courses are CPD accredited and validated for industry requirements.
You do not need to become a physiotherapist. You do need to know enough to stay safe, keep the client in charge and make your gym a place people want to come back to.
Tommy
Build the skills with Inclusive-AF
If you want a structured way to learn this, start with our free introductory course. The Crash Course: Train Clients With Disability gives you practical, non-patronising foundations. From there, our store offers further modules, including The Social Model of Disability at A$40 one-off and History of Disability in Australia at A$20 one-off.
Running a gym or a team? We offer group and team enrolment, so your whole staff can learn the same approach. See group and team enrolment or read our group training rollout plan for how to roll it out.
FAQ
What are transfer techniques?
They are the methods used to move between a wheelchair and another surface. Australian guidance lists independent sitting and standing transfers, and assisted sitting, standing and full-lift transfers, sometimes using a board. The right one depends on the person’s ability and preference.
How do I help a wheelchair user onto gym equipment?
Ask how they usually do it and what help they want. Put the brakes on, bring the chair close, clear the path and move removable parts if appropriate. Then let the client lead, and offer help only as asked.
What are the correct body mechanics for a transfer?
Stand with your feet apart, avoid leaning forward, brace your body and use your whole body. Lift rather than bump or drag, and check whether you need more help. Don’t grip the person’s clothes or belt loops.
When should I refuse to do a manual transfer?
Whenever you are unsure you can manage it safely. Stop, make the person comfortable and choose another approach, such as seated work in the chair or a second helper. The client’s physiotherapist or occupational therapist can advise on a safer method.
Do I need training before assisting with transfers?
Yes, if you plan to help regularly. Learn the basics of assessment, consent and safe lifting, and get specific input from a health professional for complex clients. Our crash course is a practical place to begin.
Sources
- Teaching the Skill: Transfers, Queensland Government
- IFIT: Inclusive Fitness Training, NCHPAD
- SISFFIT033 Complete client fitness assessments, training.gov.au
- Professional Conduct Standards of Practice, NCSF
- A Wheelchair Users Guide for Using Fitness Equipment
- Wheelchair Skills Training: Transfers, Physiopedia
- Indoor Venues Sport Specifications, Guidelines and Recommendations, ASAPD
- OneAbility Handbook, PISE
- Inclusive and para-sport equipment: specifying and funding accessible facilities
- Beginner Injury Prevention: How to Start Training Safely